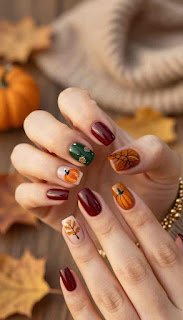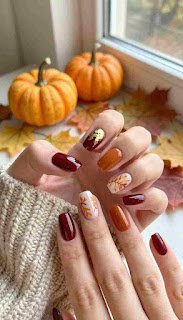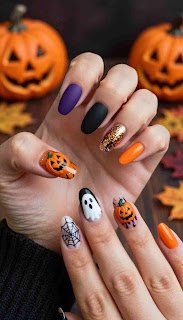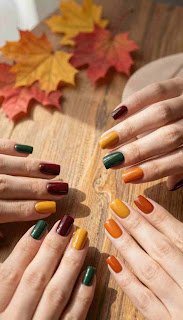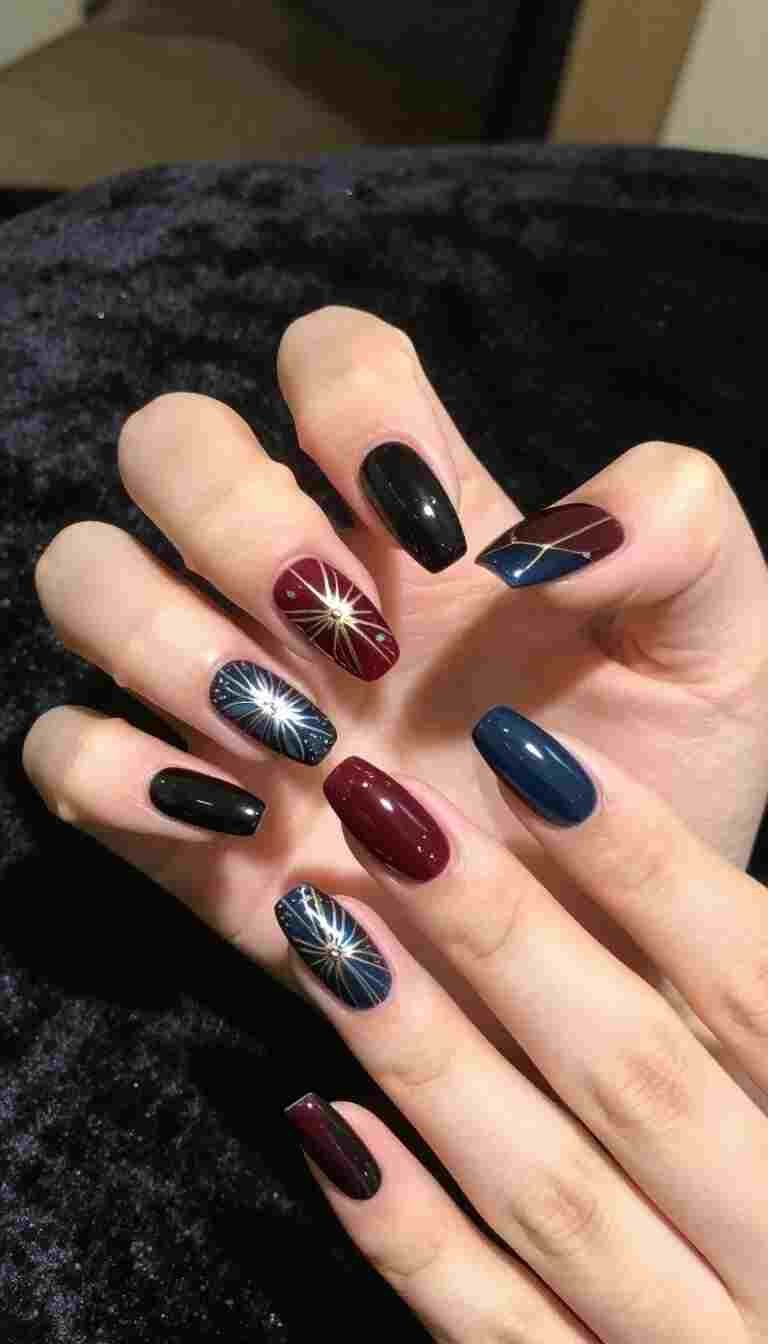
Getting your manicure ready for the autumn season is a fun way to celebrate the upcoming festivities. Whether you prefer subtle accents or bold, artistic statements, there are plenty of halloween nails ideas to match your personal style.

You can experiment with classic orange and black palettes or try modern chrome finishes for a sleek touch. From cute ghosts to dramatic vampire-inspired designs, these festive nail polish colors offer something for every skill level.
Our guide explores various shapes and lengths to ensure your hands look perfect for any party. Discover how to achieve professional results at home with these creative trends.
Key Takeaways
- Explore a wide range of seasonal designs from minimalist to elaborate.
- Learn how to use festive polish shades to elevate your look.
- Find inspiration for different nail shapes and lengths.
- Master simple techniques for creating spooky art at home.
- Choose styles that fit both casual events and formal gatherings.
Halloween Nails Ideas for Eerie Classic Manicures
Embrace the spooky season with these iconic and hauntingly beautiful manicure ideas. Classic themes remain a favorite because they perfectly capture the essence of October while staying incredibly versatile. Whether you prefer subtle hints of the holiday or bold, theatrical statements, these designs offer something for everyone.
Black-and-Orange Nails With a Modern Color-Blocked Finish
Pairing festive Halloween polish colors with clean geometric shapes
You can easily update traditional shades by using sharp, clean lines. By dividing your nail into sections, you create a sophisticated look that feels fresh and modern. Festive nail polish colors like pumpkin orange and midnight black work best when applied with precision.
- Use striping tape for perfect geometric lines.
- Alternate colors on each nail for a playful vibe.
- Add a matte top coat to soften the contrast.
- Keep the shapes simple to maintain a clean aesthetic.
Vampire Nails With Blood-Red Accents
Using deep burgundy, crimson, and glossy black for a dramatic manicure
Channel your inner creature of the night with vampire nails that demand attention. These designs rely on rich, dark tones to create a moody and mysterious atmosphere. A high-gloss finish is essential to mimic the look of fresh, dramatic polish.
To achieve this look, layer deep burgundy over a base of glossy black. You can also add crimson drips near the cuticle for an extra touch of horror. This style is perfect for those who want spooky nail designs that feel both elegant and intense.
Spooky Spiderweb Nails on a Midnight Base
Creating delicate webs with white, silver, or glow-in-the-dark details
Spiderwebs are a staple of the season, and they look stunning against a dark background. Using a thin brush, you can draw intricate webs that pop against black or deep purple polish. For an added surprise, try using glow-in-the-dark paint to make your manicure shine after the sun goes down.
Gothic Coffin Nails With Lace and Dark Metallic Details
Combining matte polish, chrome accents, and pointed nail shapes
The coffin shape provides the perfect canvas for a gothic-inspired manicure. By mixing textures, you can create a look that is both edgy and refined. Festive nail polish colors like charcoal and silver pair beautifully with delicate lace decals.
Consider using chrome powder on one or two accent nails to add a metallic sheen. This combination of matte finishes and shiny chrome creates a high-fashion look. These vampire nails and gothic styles ensure your hands are ready for any Halloween event.
Cute Halloween Nail Art for a Playful Seasonal Look
If you prefer a manicure that feels lighthearted and fun, cute Halloween nail art is the perfect choice for your next salon visit. This style focuses on charm and whimsy rather than horror, making it ideal for everyday wear throughout October. You can easily express your festive spirit with designs that prioritize joy and creativity.

Ghost Nail Designs With Friendly Expressions
Adding tiny eyes, blush, and smiling details to make ghost motifs cute
Instead of opting for spooky silhouettes, try incorporating ghost nail designs that look approachable and sweet. By adding tiny black dots for eyes and a small curved line for a smile, you turn a simple white shape into a lovable character. A touch of pink blush on the cheeks adds an extra layer of warmth to these friendly spirits.
Smiling Pumpkins and Jack-o’-Lantern Nail Art
Choosing orange shades and varied faces for a cheerful manicure
Pumpkins are a staple of the season, but you can make them feel fresh by choosing vibrant orange shades. Experiment with different facial expressions, such as winking eyes or wide, happy grins, to keep your cute halloween nail art feeling dynamic. This approach ensures your manicure remains cheerful and perfectly suited for the autumn festivities.
Black Cats, Bats, and Little Witch Hats
Arranging simple seasonal icons across accent nails without overcrowding the design
You do not need to cover every nail in complex imagery to make a statement. Try placing a single black cat or a tiny witch hat on just one or two accent nails. This minimalist strategy keeps your ghost nail designs and other icons looking clean and intentional rather than cluttered.
Sweet Candy Corn Nails With Soft Pastel Colors
Updating the traditional candy corn palette with cream, peach, and muted yellow
Traditional candy corn colors can sometimes feel too bold for a soft, playful aesthetic. You can modernize this classic look by swapping bright yellow and orange for cream, peach, and muted yellow tones. These soft pastel colors provide a sophisticated yet adorable twist that pairs beautifully with any seasonal outfit.
Trendy Halloween Manicure Ideas for a Stylish Finish
A trendy Halloween manicure can be both festive and incredibly chic for any event. You do not have to sacrifice elegance to embrace the spirit of the season. By choosing the right textures and colors, you can achieve a look that feels both sophisticated and fun.

Chrome Halloween Nails With Reflective Metallic Accents
Using silver, gunmetal, and copper chrome to elevate spooky nail designs
Chrome powders are a fantastic way to add a futuristic edge to your nails. Silver and gunmetal chrome provide a sleek, industrial vibe that works perfectly for a modern aesthetic. You can also use copper tones to bring a warm, autumnal glow to your spooky nail designs.
Velvet Cat-Eye Nails in Black, Plum, and Emerald
Creating a dimensional finish that works for parties and evening events
Velvet cat-eye polish creates a stunning, shifting effect that mimics the look of crushed velvet. These deep shades like plum, emerald, and midnight black are ideal for evening gatherings. The magnetic particles catch the light, giving your nails a luxurious, multi-dimensional appearance.
Negative-Space Halloween Nails With Minimalist Motifs
Leaving portions of the natural nail visible around moons, bats, and cobwebs
Minimalism is a great approach if you prefer a subtle nod to the holiday. By leaving parts of the natural nail exposed, you create a clean and airy look. Delicate hand-painted bats or tiny cobwebs look incredibly sharp when placed against a clear or base.
French Tip Halloween Nails With Seasonal Twists
Replacing classic white tips with orange, black, blood-red, or glitter polish
The classic French manicure gets a festive update with just a few simple changes. You can swap the traditional white tips for bold orange, deep black, or striking blood-red polish. Adding a touch of glitter to the tips is another easy way to make your nails stand out at any party.
Creepy Nail Art Inspiration for a Bold Statement
If you want to make a truly haunting impression this October, look no further than these bold designs. Finding the right creepy nail art inspiration can transform your look from simple to show-stopping. These styles focus on high-impact visuals that capture the essence of horror while remaining stylish.

Eye-See-You Nails With Detailed Iris Designs
Layering contrasting colors to create an eerie, watchful effect
Create a sense of mystery by painting realistic eyes directly onto your nails. By layering contrasting colors like deep blues, vibrant greens, and stark whites, you can achieve a piercing, watchful gaze that follows everyone in the room.
Graveyard Nails With Tombstones and a Misty Moon
Building depth with charcoal backgrounds, gray silhouettes, and pale highlights
Capture the spooky atmosphere of a cemetery by using a dark, moody palette. Start with a charcoal base and add gray silhouettes of tombstones, finishing with pale highlights to mimic the glow of a misty moon.
Monster and Zombie Nails With Textured Details
Using green, gray, and distressed red shades for a deliberately unsettling look
Embrace the undead with designs that feature raw, textured finishes. Using a mix of swampy green, muted gray, and distressed red shades creates a gritty, unsettling aesthetic that is perfect for a bold Halloween statement.
Bloody Drip Nails for a Dramatic Horror-Inspired Style
Keeping the design polished with controlled drip shapes and high-shine topcoat
For a classic horror look, nothing beats the visual impact of dripping blood. You can keep this creepy nail art inspiration looking sophisticated by using controlled drip shapes and a high-shine topcoat to ensure a professional, glossy finish.
Halloween Nail Designs for Every Nail Length and Shape
Choosing the right design starts with understanding how your nail shape influences the final result. Whether you are heading to a costume party or just want to celebrate the season, your nails serve as the perfect canvas for spooky nail designs. By matching your art to your specific nail length, you ensure a polished and professional look every time.

Short Halloween Nails That Keep Details Simple
Choosing tiny ghosts, micro-pumpkins, and single-color accents for limited space
Short nails are incredibly practical and offer a clean aesthetic. When working with limited surface area, focus on minimalist art that makes a big impact without feeling cluttered.
- Use tiny ghost decals for a cute, eerie vibe.
- Paint micro-pumpkins on just one accent nail.
- Apply single-color polish in deep black or burnt orange for a bold finish.
Almond and Oval Nails for Elegant Seasonal Designs
Using curved French tips, celestial details, and delicate spiderweb patterns
Almond and oval shapes provide a graceful, elongated appearance that works beautifully with intricate motifs. These shapes naturally complement curved lines, making them ideal for spooky nail designs that require a bit of flow.
Consider using a dark base with silver celestial stars or thin, hand-painted spiderwebs that follow the curve of your nail tip. These designs look sophisticated while still embracing the festive spirit of the holiday.
Coffin and Stiletto Nails for Maximum Drama
Taking advantage of longer surfaces for layered scenes and bold artwork
If you prefer longer nails, you have the perfect platform for detailed, multi-layered artwork. Coffin and stiletto shapes allow for complex scenes, such as haunted graveyards or detailed monster portraits.
Because these shapes offer more room, you can experiment with spooky nail designs that incorporate texture, rhinestones, and layered colors. The extra length ensures that your boldest creative ideas remain visible and striking.
Easy Designs for Natural Nails and Press-Ons
Matching nail art complexity to durability, flexibility, and everyday wear
When choosing between natural nails and press-ons, consider your daily routine and the durability of your chosen art. Simple, high-quality stickers or classic polish colors are often best for natural nails to prevent damage.
If you opt for press-ons, you can choose more complex 3D designs without worrying about long-term wear. Always ensure your design matches your lifestyle to keep your manicure looking fresh throughout the entire season.
How to Create Halloween Nails at Home
Mastering a diy halloween nail tutorial allows you to express your creativity during the festive season. You do not need to visit a salon to achieve a professional and spooky look. With a few essential supplies, you can transform your nails into a seasonal masterpiece.
Prepare the Nails for Smooth, Long-Lasting Polish
Cleaning, shaping, buffing, and applying a protective base coat
Start by cleaning your nails thoroughly to remove any natural oils or old polish residue. Use a high-quality file to shape your nails into your preferred style, such as coffin or almond. Gently buff the surface to create a smooth canvas for your art.
Always apply a protective base coat before adding any color. This step prevents staining and helps your manicure last much longer. A strong foundation is the secret to any successful DIY project.

Build the Design With the Right Tools and Techniques
Using dotting tools, fine brushes, nail stickers, stamping plates, and striping tape
To create intricate details, you will need the right equipment. Dotting tools are perfect for making eyes or polka dots, while fine brushes allow for precise lines. You can also use striping tape to achieve clean, geometric patterns.
If you prefer a faster method, nail stickers and stamping plates offer instant, detailed designs. These tools help you maintain control over your artwork, ensuring your spooky motifs look sharp and intentional. Experimenting with these items is the best part of any diy halloween nail tutorial.
Seal the Manicure and Protect the Artwork
Applying thin topcoat layers and allowing enough drying time between steps
Once your design is complete, you must seal it to prevent chipping. Apply a thin layer of a high-quality topcoat to lock in your hard work. Thin layers are essential because they dry faster and prevent bubbling.
Patience is key when working on detailed nail art. Allow enough drying time between each step to ensure the polish sets properly. This prevents smudging and keeps your design looking fresh for days.
Follow Safety Tips for DIY Halloween Nail Tutorials
Using products in a ventilated space and avoiding polish on irritated skin
Safety should always be a priority when working with nail chemicals. Always perform your diy halloween nail tutorial in a well-ventilated space to avoid inhaling strong fumes. Open a window or use a fan to keep the air moving.
Finally, be careful to avoid getting polish on irritated or broken skin. If you notice any redness or discomfort, stop immediately and clean the area. Keeping your skin healthy ensures that your festive manicure remains a fun and safe experience.
Conclusions:
Your manicure serves as the perfect canvas for seasonal expression during the month of October. Exploring various halloween nails ideas allows you to showcase your personality through intricate art or minimalist designs.
Select a look that matches your specific nail length and shape to ensure comfort throughout your daily routine. Whether you prefer the drama of long stiletto tips or the practicality of short natural nails, the right polish choice makes a significant impact.
Consider the event or party you plan to attend when choosing your aesthetic. Bold, horror-inspired motifs create a striking statement, while playful ghosts and pumpkins offer a charming touch for casual gatherings.
Experimenting with different textures like chrome, velvet, or matte finishes keeps your style fresh and modern. Use high-quality top coats from brands like OPI or Essie to protect your hard work and extend the life of your manicure.
Gather your favorite tools and colors to start your creative journey today. Trying out new halloween nails ideas is a fun way to celebrate the season with confidence and flair.